Thanks for Blog Hopping with the Creative Life Scrapbooking Team.
Hope you are enjoying all the great ideas so far.
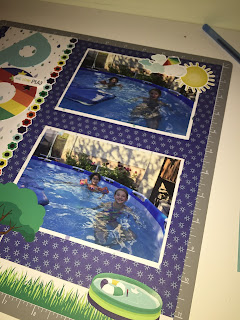
For my Blog Hop I Created a layout with Beneath the Pines Collection.
For this layout I used 2 patterned papers for my base.
Using the patterned paper with the trees cut two pieces at 3.5 inches and place on the top of the layout.
For the fun Title I used the beneath the pines mat pack card.
Using the the heart CCS pattern, cut a heart using the the Red blade.
To create layers I used the green blade with the wild oats that was in the cardstock buffet promo.
Use the blue blade with the black shimmer cardstock.
( The black and white cardstock would also be also fabulous )
I embellished the title with stickers and beneath the pines laser cut embellishments and the spiky evergreen border maker punch.
I used border stickers to connect the back ground papers
I used some mats from the mat pack and papers to mat the photos ..
Don't forget about this great 2 way corner rounder .. its a quick way to add interest to your pages.
I used the inverted side of the corner rounder punch with some of my mats
to create a fun journaling box I used a mat from the mat pack.
Cut with trimmer at 2.5 inches and then punched with the new tag punch.
I layered with stickers and other embellishments
To create another cluster I used the oval CCS and some punch outs using the spiky evergreen border maker cartridge. I added a few fun stickers to finish off the cluster.
I used a Frame that I had from the Keepsakes laser cuts ..matches perfectly.
Love how a lot of the collections go together so fabulously .
Thank you for checking out my Blog
If you want to get any of this great collection you can go to
Happy Scrappin'
Please check out the next blog here with Meggan.
and if you missed any... here are all the blogs below.
Stop 1: Karyn from Karyn's Croppers
Stop 2: Diana from D. Brinsley's Memory Keeping Blog
Stop 3: Lisa from Lisa's Workshop
Stop 4: Noreen from Organized and Creative Mom
Stop 5: YOU ARE HERE Krista from Scrappin with Krista
Stop 6: Meggan from The Printed Project
Stop 7: Tammy from Photos2Albums
Stop 8: Tessa from Tessa Scrapbooks
Stop 2: Diana from D. Brinsley's Memory Keeping Blog
Stop 3: Lisa from Lisa's Workshop
Stop 4: Noreen from Organized and Creative Mom
Stop 5: YOU ARE HERE Krista from Scrappin with Krista
Stop 6: Meggan from The Printed Project
Stop 7: Tammy from Photos2Albums
Stop 8: Tessa from Tessa Scrapbooks


